Quickstart demo stack on Kubernetes
With this step-by-step guide kubriX with its default demo stack gets deployed on your preferred Kubernetes cluster.
Prerequisites
- check Prerequisites
- DNS-Provider which is supported by external-dns (see https://kubernetes-sigs.github.io/external-dns/latest/#new-providers )
- Kubernetes cluster with at least 4 CPU cores and 20 GB RAM
Installation steps
-
create new empty customer repo on your Git-Server (GitLab, GitHub, Gitea, ...). We fully tested this with GitHub, but others should also work.
IMPORTANT: the repo needs to be empty (also no initial README!!!)
-
create an access token for this new repo with write access
Instead of a newly created access token you can also use your personal access tokens, but this is not recommended since your personal access token has probably more permissions than needed.
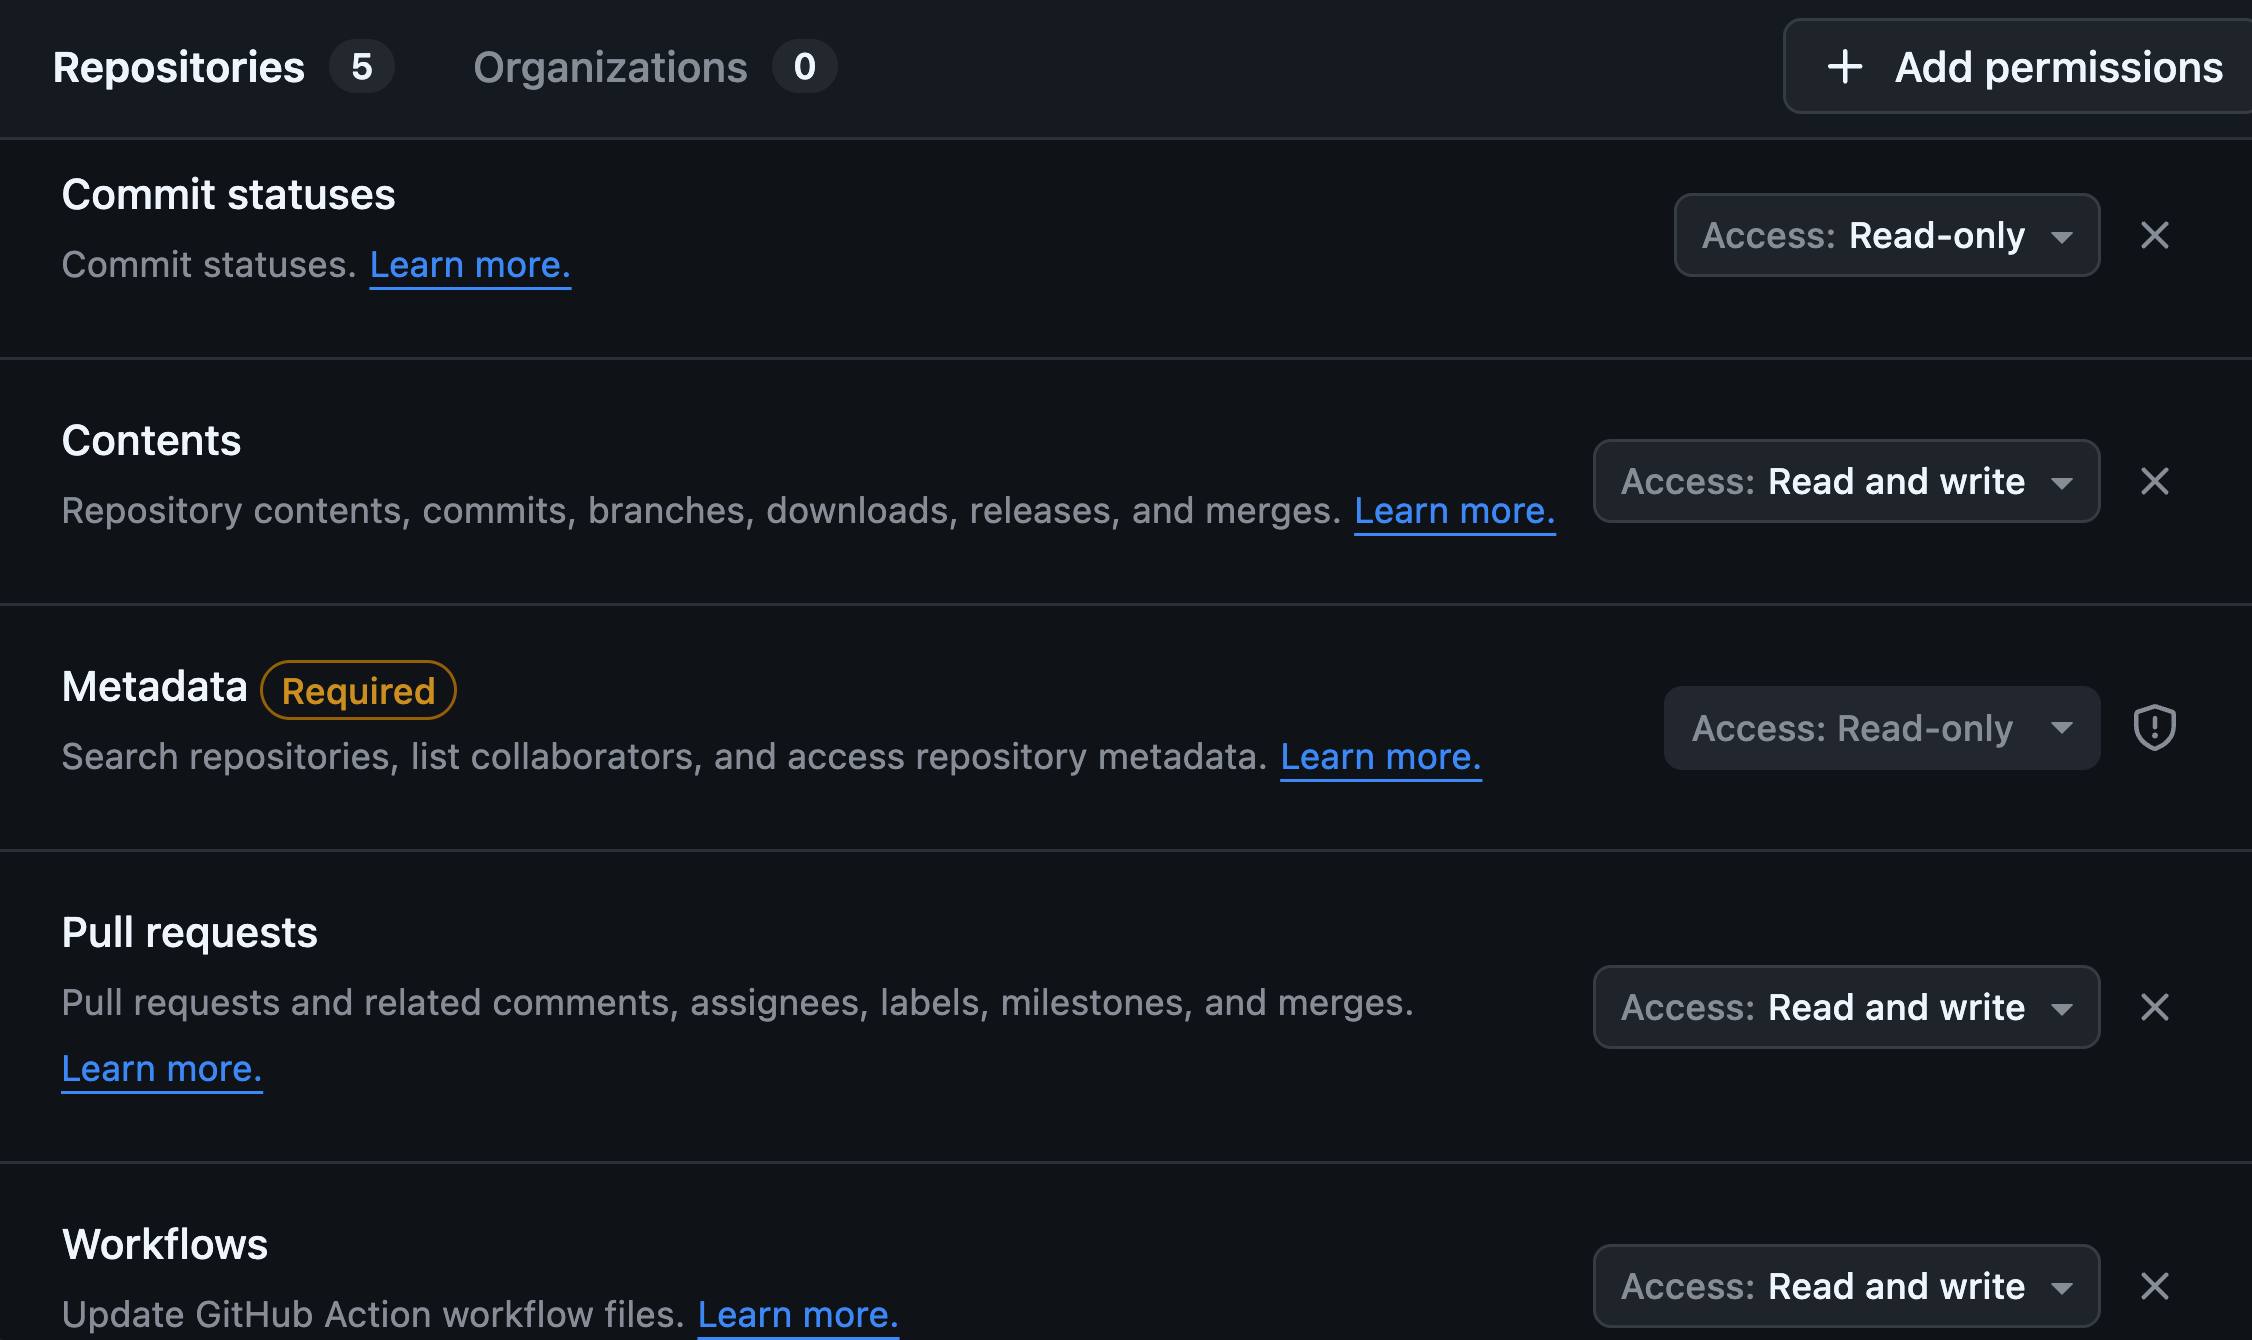
If you create a fine-grained token on Github, these are the needed permissions:
-
set the repo url and token in this variables like this:
export KUBRIX_REPO="https://github.com/kubriX-demo/kubriX-demo-customerXY"
export KUBRIX_REPO_PASSWORD="blabla" -
set your GitHub Username:
export KUBRIX_GIT_USER_NAME="your-github-username" -
optional: set the DNS provider, which external-dns should connect to.
default: ionos
supported: ionos, aws, stackit, cloudflareexport KUBRIX_DNS_PROVIDER="ionos" -
optional: set the domain, under which kubriX should be available.
This domain will be used by external-dns. Your provider in step 4 needs to be able to manage this domain with the credentials set in step 8.
export KUBRIX_DOMAIN="demo-johnny.kubrix.cloud"if this variable is not set, a subdomain of "kubrix.cloud" is randomly created (for example "demo-2faf23d.kubrix.cloud")
-
optional: set the kubrix target type which should be used
export KUBRIX_TARGET_TYPE="kubrix-oss-stack"if this variable is not set, "kubrix-oss-stack" is used.
-
create a new Kubernetes cluster and be sure that kubectl is connected to it. check with
kubectl cluster-info -
provide external-dns secrets depending on your DNS provider
ionos
create a secret with your DNS api-key like this:
kubectl create ns external-dns
kubectl create secret generic ionos-credentials -n external-dns --from-literal=api-key='your-api-key'
aws
create a
credentialsfile like this:[default]
aws_access_key_id = your-key-id
aws_secret_access_key = your-access-keyand then create the secret on the K8s cluster based on this
credentialsfile:kubectl create ns external-dns
kubectl create secret generic -n external-dns sx-external-dns --from-file credentialsstackit
kubectl create ns external-dns
kubectl create secret generic external-dns-webhook -n external-dns --from-literal=AUTH_TOKEN='your-auth-token'
--from-literal=PROJECT_ID='your-project-id'
cloudflare
kubectl create ns external-dns
kubectl create secret generic cloudflare-api-key -n external-dns --from-literal=apiKey='YOUR_API_TOKEN' -
If you need to prepare something else on your cluster before kubriX gets installed, do this now.
-
Create a
kubrix-installNamespace and a Secretkubrix-installer-secretsto configure the installer.kubectl create ns kubrix-install
kubectl create secret generic kubrix-install-secrets -n kubrix-install \
--from-literal KUBRIX_REPO=${KUBRIX_REPO} \
--from-literal KUBRIX_REPO_PASSWORD=${KUBRIX_REPO_PASSWORD} \
--from-literal KUBRIX_GIT_USER_NAME=${KUBRIX_GIT_USER_NAME} \
--from-literal KUBRIX_DOMAIN=${KUBRIX_DOMAIN} \
--from-literal KUBRIX_DNS_PROVIDER=${KUBRIX_DNS_PROVIDER} \
--from-literal KUBRIX_TARGET_TYPE=${KUBRIX_TARGET_TYPE} \
--from-literal KUBRIX_BOOTSTRAP=true \
--from-literal KUBRIX_INSTALLER=true -
Then apply the installer manifests:
kubectl apply -f https://raw.githubusercontent.com/suxess-it/kubriX/refs/heads/main/install-manifests.yamlThese manifests will create a Kubernetes Job which creates a clone of the upstream kubriX OSS repo with some customizations in your newly created repo and starts the installation on your Kubernetes cluster.
This could take up to 30 minutes, depending how powerful your local environment is.
You can watch the logs of the job with
kubectl logs -n kubrix-install -f "pod/$(kubectl get pod -n kubrix-install -l "job-name=kubrix-install-job" -o jsonpath='{.items[0].metadata.name}')" --all-containers=trueEspecially Keycloak could take a while, since there are many resources created via Crossplane in different ArgoCD sync-waves. After 300 seconds the sync process gets terminated and restarted. This could happend sometimes and is not always indicating a problem. Also, sometimes the Keycloak app could be in temporary
Degradedstate during installation, but getsHealthyafterwards.